Easy Origami Turtle: Step-by-Step Paper Craft
Origami Turtle instructions await you! Get ready to fold a charming little creature that will bring a smile to your face. Imagine a sweet, squat turtle, its shell beautifully textured and its little head peeking out, ready to embark on its imaginary journey. This project is absolutely perfect for complete beginners and wonderful for kids looking for a fun, hands-on activity. It’s also a delightful idea for making a set of unique decorations or thoughtful, handmade gifts. In about 15-20 minutes, you’ll have your very own origami turtle to display! We’ll guide you through each simple fold, teaching you basic origami techniques that are easy to master. Let’s grab some paper and start folding!
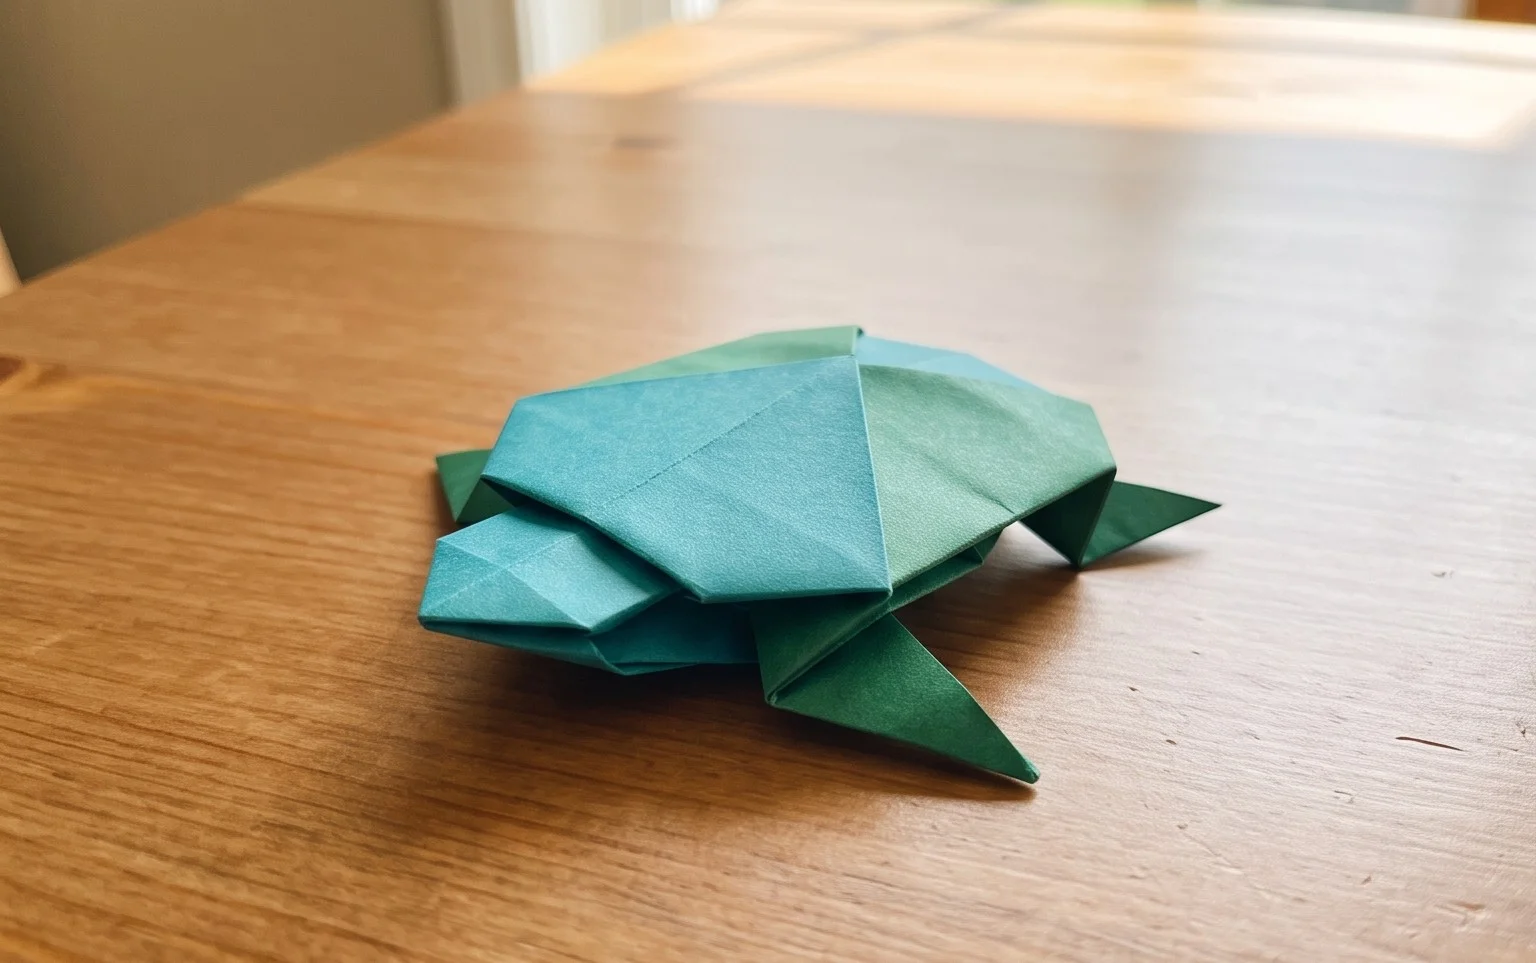
Origami Turtle: Step-by-Step Instructions
Hello there! I’m so excited to guide you through creating your very own origami turtle. This is a wonderful model for beginners, with just enough complexity to be satisfying but not so much that it becomes overwhelming. The finished turtle is charming and surprisingly stable, making it a great little desk companion or a thoughtful handmade gift. We’ll go through everything step-by-step, and I’ll be here to help you avoid common pitfalls. Let’s get started on this delightful paper journey!
Choosing Your Paper
The first step in any origami project is selecting the right paper. For this turtle, you have a few excellent options, and the choice often comes down to personal preference and the desired look of your finished model.
Type:
- Kami paper: This is the standard origami paper. It’s thin, crisp, and holds a fold beautifully. It’s usually coloured on one side and white on the other, which is perfect for our turtle as it can create a lovely contrast for the shell and the body. It’s readily available in a vast array of colours and patterns.
- Tant paper: A slightly heavier and more textured paper than kami. It has a beautiful matte finish and a bit more tooth, which can make the finished model feel more substantial. It’s also often coloured on both sides, which can be a stylistic choice if you prefer.
- Printer paper: While not ideal for intricate models, standard printer paper can be used for practice. It’s a bit thicker and can be harder to get very crisp folds, but it’s readily available and inexpensive. If you’re just starting out and want to experiment, this is a fine choice.
Weight:
For most origami, including this turtle, a paper weight of around 70-80 gsm (grams per square meter) is ideal. Kami paper typically falls within this range. If you use paper that’s too thick, it can become bulky and difficult to fold cleanly, especially when you reach the later stages of the model.
Size:
A good starting size for this turtle is 15cm x 15cm (approximately 6 inches x 6 inches). This size is manageable for beginners, allowing you to see your folds clearly and make precise adjustments. You can certainly experiment with smaller or larger squares once you’re comfortable with the process.
Single or Double Sided:
For the classic origami turtle look, I highly recommend using single-sided paper, like kami. This way, when we make certain folds, the white side will naturally form the underside of the turtle’s shell, creating a distinct contrast. If you choose double-sided coloured paper, the entire turtle will be the same colour, which is also a perfectly lovely option, just a different aesthetic!
Base Folds: The Foundation of Your Turtle
Before we dive into the turtle itself, let’s ensure we’re comfortable with a couple of fundamental origami folds. Making these cleanly will make the entire process much smoother.
The Valley Fold:
This is the most common fold. Imagine folding a piece of paper in half so that the crease forms a “V” shape. To make a clean valley fold, align the edges or corners you are bringing together precisely. Once aligned, run your thumbnail or a bone folder along the crease from the centre outwards. This ensures the fold is sharp and stays put.
The Mountain Fold:
This is the opposite of a valley fold. Imagine folding a piece of paper so the crease forms an inverted “V” or a mountain peak. You’ll often create a mountain fold by unfolding a previous valley fold. Again, precise alignment is key, and a sharp crease made with your thumbnail or bone folder will be essential.
The Square Base (Preliminary Fold):
This is a very common base in origami and is crucial for our turtle.
1. Start with your square paper coloured side up (if using single-sided paper).
2. Fold the paper in half diagonally, bringing the bottom-left corner to meet the top-right corner. Crease well. Unfold.
3. Fold the paper in half diagonally again, this time bringing the bottom-right corner to meet the top-left corner. Crease well. Unfold. You should now have an “X” crease on your paper.
4. Flip the paper over so the white side is facing you.
5. Fold the paper in half horizontally, bringing the bottom edge up to meet the top edge. Crease well. Unfold.
6. Fold the paper in half vertically, bringing the left edge to meet the right edge. Crease well. Unfold. You should now have a “+” crease on this side.
7. Now, gently push the left and right edges inwards towards the centre. The top flap should naturally come down, collapsing the paper into a smaller square. This is your square base. Ensure the open edges are at the bottom.
Step-by-Step Origami Turtle Instructions
Let’s begin folding our turtle! Remember to make each fold as crisp and precise as possible.
1. Start with your square piece of origami paper, coloured side up. You should have an “X” crease visible.
2. Fold the paper in half diagonally, bringing the bottom-left corner to meet the top-right corner. Crease well. Unfold.
3. Fold the paper in half diagonally again, bringing the bottom-right corner to meet the top-left corner. Crease well. Unfold. You should have an “X” crease.
4. Flip the paper over so the white side is facing you.
5. Fold the paper in half horizontally, bringing the bottom edge up to meet the top edge. Crease well. Unfold.
6. Fold the paper in half vertically, bringing the left edge to meet the right edge. Crease well. Unfold. You should have a “+” crease.
7. Now, gently push the left and right edges inwards towards the centre. The top flap should naturally come down, collapsing the paper into a smaller square. This is your square base. Ensure the open edges are pointing towards you.
8. Take the top layer of the right flap. Fold its bottom edge up to meet the centre vertical crease. Crease well.
9. Repeat step 8 with the top layer of the left flap, folding its bottom edge up to meet the centre vertical crease. Crease well. You should now have a kite shape on the top flap.
10. Now, take the small triangular flap at the very top of the kite shape you just created. Fold this triangle down over the two flaps you just folded in. The tip of the triangle should align with the point where the two flaps meet the centre crease. Crease well.
11. Unfold the folds you made in steps 8, 9, and 10. You will see crease lines that form a diamond shape on the top flap.
12. Open the top flap by lifting the point upwards. Using the creases you just made, fold the right and left sides inwards. The bottom edge of the flap should then be folded upwards, flattening the paper into a long diamond shape. This is called a petal fold, and it’s a fundamental origami technique. Ensure the point of this diamond is facing away from you.
13. Flip the entire model over.
14. Repeat steps 8 through 12 on this new side. So, you’ll fold the bottom edge of the right flap to the centre crease, then the bottom edge of the left flap to the centre crease, fold the top triangle down, then unfold these three folds. Finally, perform the petal fold to create another long diamond shape on this side. You should now have a shape with two long diamond flaps on each side.
15. Orient the model so the two points of the long diamond shapes are facing upwards and downwards. The open edges should be on the left and right.
16. Take the top-most point of the model. Fold it down towards the bottom point, aligning the tip of the top point with the bottom point. Crease firmly. This fold will be the beginning of the turtle’s shell.
17. Now, focus on the right-hand side. You’ll see two flaps. Take the top flap. Fold its outer edge inwards, so it aligns with the vertical centre crease. Crease well.
18. Repeat step 17 with the bottom flap on the right-hand side. Fold its outer edge inwards so it aligns with the vertical centre crease. Crease well.
19. Flip the entire model over.
20. Repeat steps 17 and 18 on this new side. You’ll be folding the outer edges of both the top and bottom flaps inwards to align with the centre crease. You should now have a more elongated, somewhat pointed shape.
21. Now, let’s create the head and tail. Look at the point at the very top of the model. We’re going to make an inside reverse fold to form the head. Gently open the layers slightly. Push the tip inwards and downwards, creating a small point that will become the head. It’s like turning the point inside out. Try to make this fold about 1-2 cm (about ½ inch) down from the very tip. Crease firmly.
22. Now, look at the bottom point of the model. We’ll do the same for the tail, but it will be a slightly shallower inside reverse fold. Open the layers slightly and push the tip inwards and upwards. Again, make this fold about 1 cm (about ½ inch) up from the very tip. Crease firmly.
23. Now, let’s form the legs. Look at the sides of the turtle. You’ll see two flaps on each side. Take the right-hand side. We need to make an inside reverse fold to create the front legs. Take the front-most of the two flaps on the right. Open the layers slightly, and push the tip inwards and downwards to create a leg shape. This fold should be roughly parallel to the body.
24. Repeat step 23 for the back-most flap on the right-hand side, creating the back leg.
25. Flip the entire model over.
26. Repeat steps 23 and 24 on this side to create the remaining two legs.
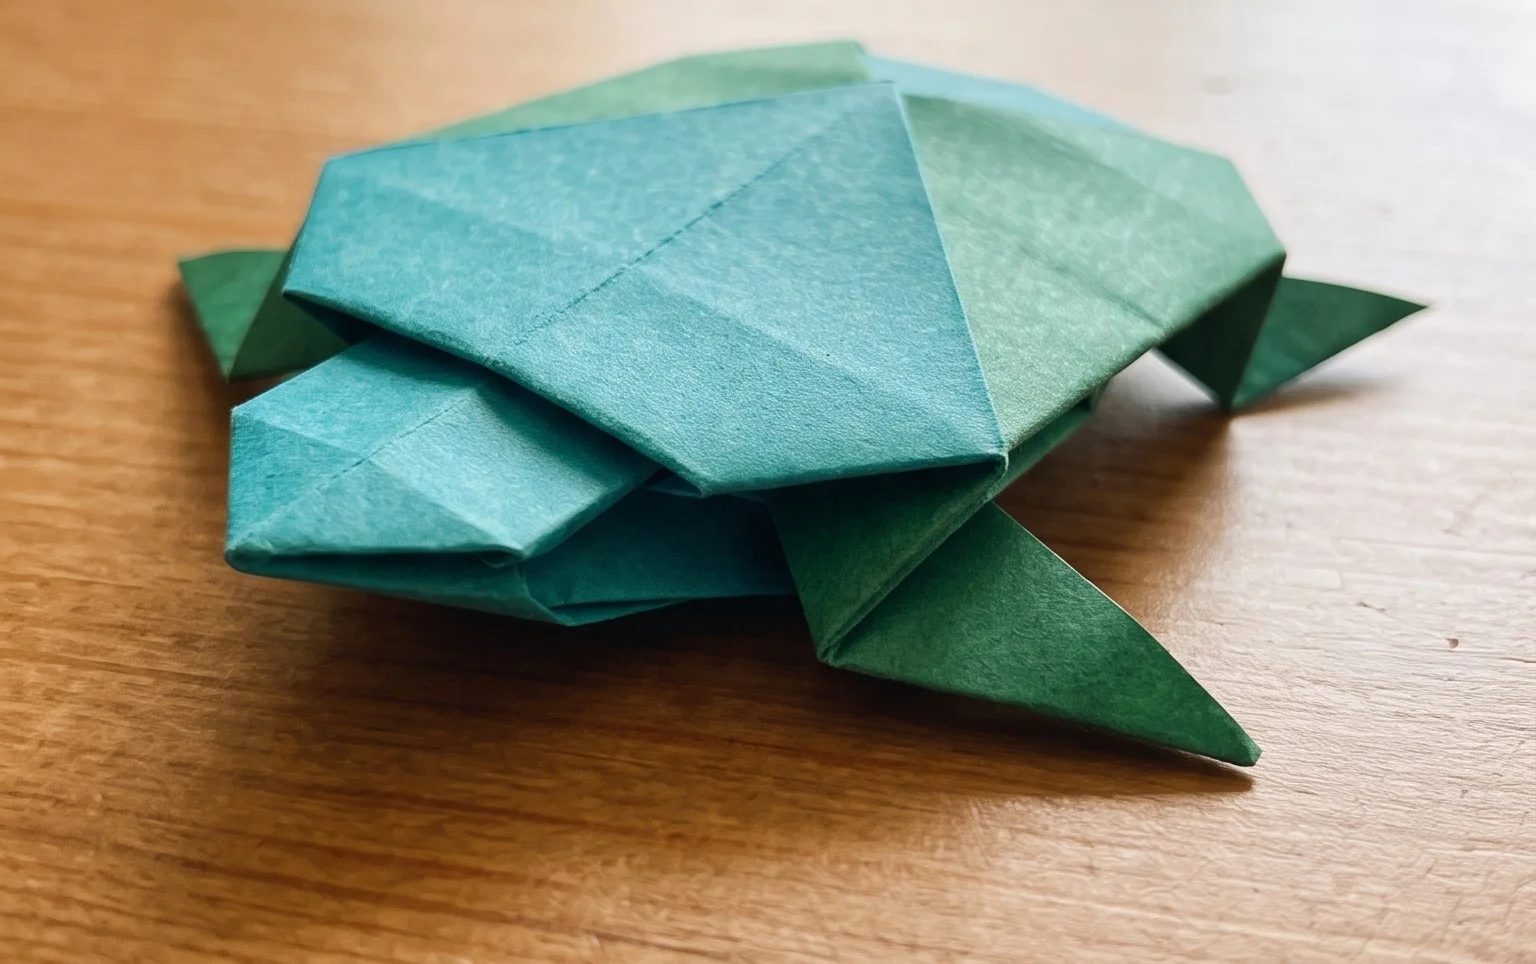
27. Gently shape your turtle. You can gently pull the legs apart slightly to make them more distinct. The head and tail should also be positioned nicely. You’ve made an origami turtle!
Common Beginner Mistakes and How to Avoid Them
Even with the best intentions, we can sometimes stumble! Here are a couple of places beginners often find tricky with this turtle, and how to navigate them:
* The Square Base Collapse: This is where many get stuck on step 7. The key here is to be gentle but firm. Ensure you have clearly creased your horizontal and vertical folds on the white side. When you push the left and right edges inwards, the paper wants to fold along those existing creases. If it feels stiff, double-check that your creases are sharp. You might need to slightly encourage the paper by guiding the corners. Don’t force it too hard, or you might tear the paper. Imagine the paper naturally wanting to collapse into the square shape.
* The Petal Fold (Step 12 and 14): The petal fold can be a bit confusing the first time you encounter it. The crucial part is using your pre-existing creases as guides. When you lift the top flap, you’re essentially creating a diamond. The creases you made in steps 8-10 (or 17-18) are your markers for where to fold the sides inwards. As you bring the sides in, the bottom edge will naturally come up. The goal is to flatten the entire flap into that long diamond shape. If it’s not flattening nicely, check that your initial creases were sharp and that you’re folding along them precisely.
* Inside Reverse Folds for Head/Tail/Legs (Steps 21-24): These folds involve pushing paper inside itself. The trick is to only open the layers *just enough* to make the fold. You don’t need to fully open the model. For the head and tail, you’re creating a small point from the existing tip. For the legs, you’re creating a fold that sticks out slightly. If the folds look messy, it might be because you’re opening the paper too much, or not creasing firmly enough after the fold. Try to make the initial opening of the layers small and precise.
Varying Your Origami Turtle
The beauty of origami is its adaptability! Once you’ve mastered the basic steps, you can have a lot of fun with variations:
* Size: As mentioned, start with 15cm x 15cm. If you want smaller turtles, try 7.5cm x 7.5cm. For larger, more impressive turtles, use 20cm x 20cm or even 30cm x 30cm paper. Just be aware that larger paper might require a bit more effort to make crisp folds, and smaller paper will demand more precision.
* Paper Pattern: This is where you can really get creative!
* Patterned Kami: Use paper with floral designs, geometric patterns, or even animal prints for a unique turtle shell.
* Washi paper: This traditional Japanese paper often has beautiful textures and subtle patterns.
* Metallic paper: For a more glamorous turtle!
* Chiyogami paper: Intricately patterned and very decorative.
* Colour:
* Classic green or brown: For a realistic turtle.
* Bright and bold colours: For a whimsical and eye-catching turtle.
* Two-toned paper: If you find paper that’s a different colour on each side, you can achieve interesting effects, though for this model, single-sided kami is generally preferred for the distinct shell and body colours.
Displaying or Gifting Your Finished Turtle
Your finished origami turtle is more than just folded paper; it’s a little work of art!
* Desk Companion: Its flat base makes it perfect for sitting on your desk, adding a touch of handmade charm to your workspace.
* Mobile or Garland: Punch a small hole in the top of the shell and thread it onto a string. You can make a series of turtles in different colours and sizes to create a charming mobile or a festive garland.
* Part of a Scene: Combine your turtle with other origami animals or craft supplies to create a miniature diorama.
* Gifts: These turtles make wonderful, thoughtful gifts.
* **For Children:** They are a lovely, non-toy gift that encourages appreciation for crafts and nature.
* **For Teachers or Colleagues:** A small, handmade token of appreciation.
* **As Party Favours:** If you’re feeling ambitious, you can fold a batch for a themed party.
* **Inside a Card:** Tuck a small origami turtle inside a birthday or thank you card for a special surprise.
I hope you’ve enjoyed folding this origami turtle with me. It’s a rewarding process, and the result is a delightful little creature that’s sure to bring a smile. Don’t worry if your first few aren’t perfect; every fold is a learning experience. Happy folding!
Conclusion
Congratulations on completing your very own origami turtle! We hope you enjoyed this fun and accessible folding adventure. Don’t worry if your first turtle isn’t perfect – every folded creation is a step in learning, and practice makes perfect. Feel free to share your adorable new friend with others, perhaps even gifting it to someone special. For your next challenge, why not try a different sized paper for a mini or jumbo turtle, or even experiment with patterned paper? There are so many more delightful paper projects waiting for you to discover. Keep folding and have fun!
